
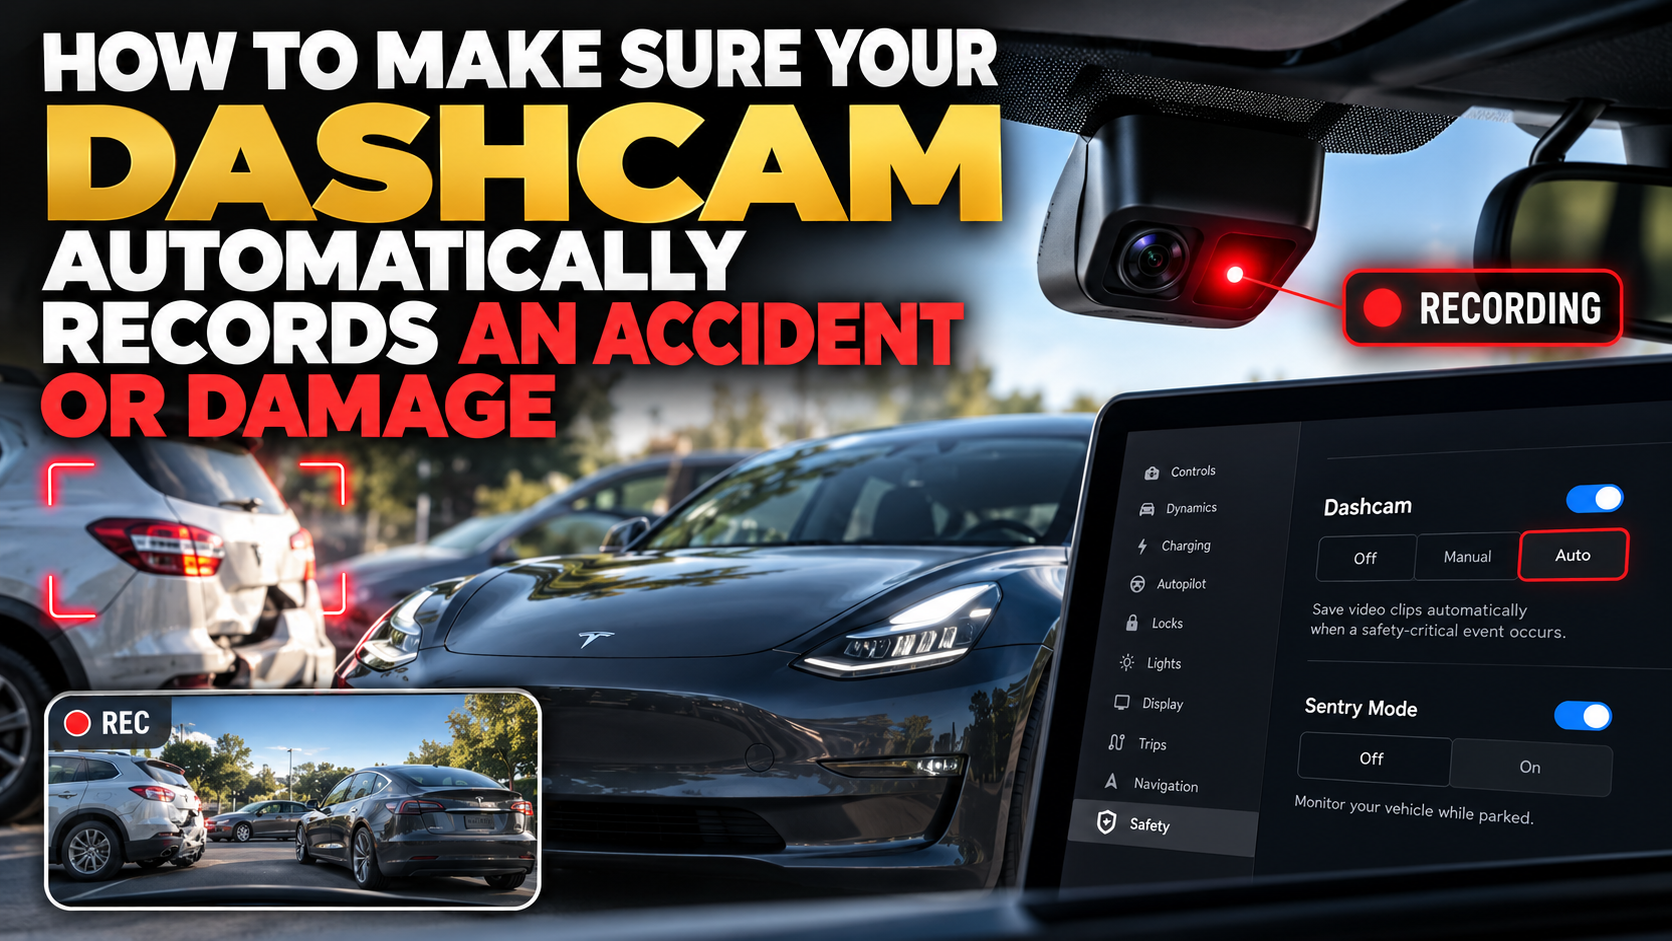
Your Tesla has built-in cameras that can help document accidents, parking lot damage, and unexpected incidents. But are you sure your Dashcam is actually recording when you need it?
Many Tesla owners assume their vehicle automatically saves video whenever something happens. Unfortunately, that isn’t always the case.
Depending on your settings, software version, storage device, and the type of incident, important footage may never be saved—or it could be overwritten before you have a chance to review it.
Whether you’re dealing with a fender bender, a hit-and-run, or damage to your parked Tesla, having the right footage could make a significant difference when documenting what happened for an insurance claim.
Here’s how to configure your Tesla Dashcam and Sentry Mode to improve your chances of capturing important incidents.
1. Make Sure Your Tesla Dashcam Is Enabled
Before anything else, confirm that your Tesla’s built-in Dashcam is activated.
Tesla Dashcam uses compatible vehicle cameras to record video while driving. Depending on your vehicle and software, recordings can be saved manually or automatically when certain events occur.
How to check your Dashcam settings
- Sit inside your Tesla and open Controls on the touchscreen.
- Navigate to Safety.
- Find the Dashcam settings.
- Select Auto to enable automatic saving of supported safety-critical events.
- Confirm that a compatible USB storage device is connected and recognized.
Important: Automatic Dashcam saving is event-dependent. Not every collision, bump, or minor incident will trigger an automatic saved clip.
For that reason, Tesla owners should also know how to save footage manually.
How to Check Your Dashcam Settings
Make sure your Tesla is configured to save important footage before an accident happens. Follow these four simple steps.
Safety
Dashcam & RecordingOpen Controls
Sit inside your Tesla and tap Controls on the touchscreen.
Select Safety
Open the Safety menu to find your vehicle's Dashcam recording settings.
Choose Auto
Select Auto to enable automatic saving when supported safety-critical events occur.
Verify USB Storage
Make sure your Tesla recognizes a compatible USB drive. Save a test clip and verify it plays in Dashcam Viewer.
Tesla's Auto setting does not guarantee that every accident or minor impact will be recorded. Learn how to save footage manually and check your USB drive regularly.
2. Enable Automatic Dashcam Recording for Accidents
One of the most useful Dashcam settings is Auto.
When enabled, your Tesla can automatically save footage to your USB drive when it detects certain safety-critical events, such as a collision or airbag deployment.
However, automatic saving is not guaranteed for every incident.
A low-speed parking lot collision, a minor scrape, or damage caused by another driver might not meet the conditions needed to trigger an automatic save.
Recommended setup
- Auto: Enable automatic saving of supported incidents.
- Manual saving: Learn how to save footage using the Dashcam icon.
- On Honk: If available, enable saving footage when you press the horn.
- USB storage: Confirm your drive has adequate free space and is functioning correctly.
Depending on your Tesla software version, the available Dashcam options and menu layout may differ.
Why On Honk can be useful
If your Tesla supports the On Honk setting, pressing the horn can save Dashcam footage.
For example, if another driver suddenly cuts into your lane or nearly causes an accident, honking may help preserve the surrounding footage.
Safety tip: Never honk unnecessarily or rely on honking as your primary recording method. Focus on avoiding the collision first.
3. Check Your Tesla USB Drive Before You Need It
Your Dashcam settings won’t help much if the storage device isn’t working.
Tesla Dashcam relies on a compatible USB drive to save footage. Some vehicles include a Tesla-provided USB drive, while others may require an owner-supplied device.
How to check your USB drive
- Locate the USB port used for Dashcam recording.
- Confirm the drive is securely connected.
- Look for the Dashcam status icon on the touchscreen.
- Open the Dashcam Viewer and confirm recent clips are available.
- If necessary, use Tesla’s built-in USB formatting option under Controls > Safety, where supported.
Formatting erases existing recordings on the drive, so back up any important footage first.
Tesla generally recommends a properly formatted storage device with sufficient capacity and sustained write performance. Check your vehicle’s owner’s manual for the exact requirements.
Consider a high-endurance storage solution
Dashcam storage is written and rewritten frequently. A reliable, high-endurance USB drive or compatible SSD can be a worthwhile upgrade.
A storage device that disconnects, becomes corrupted, or cannot keep up with recording may leave you without footage when you need it.
Tesla specifies at least 64GB of capacity, sustained writes of at least 4 MB/s, USB 2.0 compatibility, and proper formatting. Supported recording ports vary by vehicle.
The Samsung BAR Plus 256GB USB 3.1 Flash Drive is a compact, durable storage solution worth considering for Tesla owners who want to save Dashcam recordings, Sentry Mode footage, and important video evidence.
With 256GB of storage and read speeds of up to 400MB/s, this USB-A flash drive provides convenient space for recording and transferring video files. Its sleek Titan Gray metal construction offers a premium look while providing resistance to water, shock, temperature extremes, magnets, and X-rays.
Why Tesla Owners Should Consider It
Tesla’s built-in Dashcam and Sentry Mode features require compatible USB storage to save recordings. Whether you’re documenting a traffic accident, parking lot damage, or suspicious activity around your vehicle, having a reliable storage device is an important part of your recording setup.
The Samsung BAR Plus offers several useful features:
-
256GB Storage Capacity: Plenty of space for saved Dashcam clips and Sentry Mode recordings, subject to recording frequency and file sizes.
-
Up to 400MB/s Read Speeds: Transfer saved footage to your computer quickly when reviewing an incident or preparing an insurance claim.
-
Durable Metal Design: Compact Titan Gray housing with protection against common environmental hazards.
-
USB 3.1 Connectivity: USB-A connection with backward compatibility for older USB standards.
-
Compact Size: Fits conveniently into a compatible Tesla USB port without taking up much space.
-
5-Year Limited Warranty: Backed by Samsung’s manufacturer warranty.
Using the Samsung BAR Plus With Tesla Dashcam
Before using this drive, confirm your Tesla has a compatible USB-A data port. Some Tesla models require a different connector or storage configuration.
Format the drive using Tesla’s built-in USB formatting feature, if supported, or follow the formatting instructions in your vehicle’s owner’s manual. Formatting will erase existing files.
After installation, verify that Dashcam recognizes the storage device and test saving and playing back a recording.
Important: The advertised 400MB/s speed is the maximum read speed, not the sustained write speed. Tesla recording compatibility is not guaranteed by read speed alone. Always verify the drive meets your vehicle’s storage requirements.
Our Recommendation
The Samsung BAR Plus 256GB is a practical storage option for Tesla owners who want a compact USB drive with generous capacity and fast file transfers. Its durable construction and convenient USB-A design make it worth considering for Dashcam and Sentry Mode use, provided it meets your Tesla’s compatibility and sustained write requirements.
Protect important footage before it’s overwritten. Check your Dashcam settings regularly and back up recordings that may be needed for an insurance claim.
4. Turn On Sentry Mode to Help Record Parking Lot Damage
Dashcam and Sentry Mode serve different purposes.
Dashcam primarily helps record driving-related events.
Sentry Mode helps monitor certain activity around your Tesla while it is parked and locked.
When Sentry Mode detects qualifying events, it may activate alerts and save video clips from supported cameras.
This can be particularly helpful for incidents involving:
- Someone hitting your parked Tesla.
- A vehicle backing into your bumper.
- Suspicious activity around your vehicle.
- Certain vandalism attempts.
- Unexpected damage in parking lots.
How to enable Sentry Mode
- Open Controls > Safety.
- Locate Sentry Mode.
- Turn it on.
- Review any location exclusions, such as Home, Work, or Favorites.
- Confirm the required USB storage device is connected.
You can also control Sentry Mode through the Tesla mobile app on supported vehicles.
Watch your location exclusions
Some owners enable Sentry Mode but configure it to exclude their home or workplace.
That means the vehicle may not monitor those locations through Sentry Mode even when the owner expects it to.
If you regularly park in an apartment complex, public garage, or busy workplace parking lot, review these exclusions carefully.
Remember: Sentry Mode does not guarantee that every incident will be detected or recorded. It also consumes additional battery power and may be unavailable under certain vehicle conditions.
5. Know How to Save Footage Immediately After an Accident
Automatic recording is helpful, but manually preserving footage is one of the most important habits a Tesla owner can develop.
After an accident, assuming everyone is safe and you’re no longer actively driving, check whether Dashcam has saved the incident.
If the video has not already been saved, use the Dashcam controls to save the relevant footage if your vehicle supports it.
What to do after an accident
- Move to a safe location and address any injuries or immediate hazards.
- Contact emergency services when appropriate.
- Save the Dashcam footage using the vehicle’s available controls.
- Avoid unnecessary changes to the USB drive.
- When safe, review the saved footage.
- Copy important recordings to another device as soon as practical.
Don’t assume that footage will remain available indefinitely.
Tesla’s rolling Dashcam recordings can be overwritten, and some footage may not be saved automatically.
Can you retrieve Tesla Dashcam footage later?
Possibly, but it depends on whether the footage was recorded and retained.
If a recording was never saved or has already been overwritten, recovery may not be possible.
That’s why preserving video promptly is so important.
6. How Tesla Dashcam Footage Can Help With an Insurance Claim
After a collision, one of the biggest challenges can be establishing exactly what happened.
Drivers may disagree about who had the right of way, whether a turn signal was used, or which vehicle entered an intersection first.
Dashcam footage can sometimes provide an independent visual record.
Examples of useful evidence
Rear-end collisions: Video may show traffic conditions, braking, and the events leading up to an impact.
Intersection accidents: Footage may help establish traffic signal conditions and vehicle movements.
Parking lot damage: Sentry Mode recordings may capture activity around your vehicle while parked.
Hit-and-run incidents: Video may reveal a vehicle’s appearance, direction of travel, or, when clearly visible, its license plate.
Disputed lane changes: Dashcam recordings may help document surrounding traffic and the sequence of events.
However, footage is only one piece of evidence. Camera angles, visibility, recording gaps, and the limitations of the footage all matter.
An insurance company will generally evaluate available evidence alongside statements, photographs, police reports, policy terms, and applicable laws.
Dashcam footage does not automatically establish fault or guarantee claim approval.
7. What to Do With Your Dashcam Footage After an Accident
If you’ve captured an accident or vehicle damage, preserve the original recording before editing or sharing it.
Follow these steps
- Save the original file. Copy the footage to a computer or secure storage location.
- Keep all relevant camera views. Different angles may show details missing from the main view.
- Preserve the date and time information. Note when and where the incident occurred.
- Take additional photos. Document vehicle damage, road conditions, signs, and other relevant details.
- Collect incident information. Obtain the other driver’s insurance and contact information when appropriate.
- Provide the footage to your insurer. Ask how to submit video evidence with your claim.
Avoid modifying the original recording. If you want to highlight a particular moment, create a separate copy.
Also be mindful of privacy and applicable laws before publicly posting footage showing other people or identifying information.
8. Test Your Tesla Dashcam Before an Accident Happens
One of the easiest ways to avoid surprises is to test your recording setup periodically.
You don’t need to simulate an accident.
Instead, perform a basic recording check while the vehicle is safely parked.
Five-minute Dashcam checklist
- Confirm Dashcam is enabled.
- Check that automatic saving is selected.
- Enable On Honk if available and desired.
- Verify the USB storage device is recognized.
- Save a short manual clip.
- Open Dashcam Viewer and confirm the clip is playable.
- Check Sentry Mode settings and location exclusions.
- Review available storage space and device health.
Repeat this check after major software updates or whenever you notice a Dashcam warning.
Is Your Tesla Dashcam Ready?
Complete these 7 quick checks to help prepare your Tesla to capture important driving and parking incidents.
9. Common Reasons Your Tesla Didn’t Record an Accident
If you discover that footage is missing, several issues could be responsible.
Dashcam was disabled
The vehicle may not have been configured to record or save footage.
USB storage was missing or malfunctioning
A disconnected, full, incompatible, or failing drive can prevent recordings from being saved.
The incident didn’t trigger automatic saving
Not every impact or sudden movement meets the conditions for Tesla’s automatic Dashcam saving.
Sentry Mode was turned off
Parking-related incidents may go unrecorded when Sentry Mode is disabled.
The location was excluded
Sentry Mode may have been configured not to activate at Home, Work, or Favorites.
Footage was overwritten
Rolling recordings are not permanent. Older footage may be replaced unless it has been saved.
Camera visibility was limited
Poor lighting, weather, dirty cameras, and obstructed views can affect what the system captures.
10. Does Having a Tesla Dashcam Lower Your Insurance Rates?
A built-in Dashcam can be valuable for documenting incidents, but it doesn’t necessarily mean your insurance premium will decrease.
Some insurance providers may offer discounts for certain safety features or driving-related programs. However, a Dashcam-specific discount should never be assumed.
Insurance pricing can depend on factors such as your location, driving history, vehicle, coverage selections, deductibles, and insurer-specific underwriting criteria.
Even without a direct discount, properly preserved video may help an insurer investigate a disputed incident.
When comparing insurance options for your Tesla, consider more than just the monthly premium. Review collision coverage, comprehensive coverage, deductibles, rental reimbursement, repair provisions, and claim procedures.
Frequently Asked Questions
Does Tesla Dashcam automatically save every accident?
No. Tesla’s automatic saving feature responds to certain detected safety-critical events. It does not guarantee that every collision, minor impact, or parking lot incident will be saved.
Does Tesla record when the car is parked?
Sentry Mode can monitor and record certain events while the vehicle is parked and locked, when enabled and operating under supported conditions.
Can Tesla Dashcam capture a hit-and-run?
It may capture useful footage if the incident occurs within camera coverage and the recording is saved. Detection and visibility are not guaranteed.
Will Tesla Dashcam work without a USB drive?
Saving Dashcam footage normally requires a compatible storage device. Consult your vehicle’s owner’s manual for its specific requirements.
How long does Tesla keep Dashcam recordings?
Retention depends on the recording type, available storage, and whether footage was saved. Unsaved rolling recordings may be overwritten, so preserve important clips promptly.
Can Dashcam footage prove another driver was at fault?
It can provide valuable evidence, but responsibility for an accident depends on the complete circumstances and applicable law.
Can I send Tesla Dashcam video to my insurance company?
Yes, insurers commonly accept relevant video evidence as part of claim investigations. Ask your insurer about supported submission methods and preserve the original recording.
Final Thoughts: Don’t Wait Until an Accident to Check Your Tesla Dashcam
Tesla’s built-in cameras can be an extremely useful ownership feature, especially when you’re trying to document an accident, unexpected damage, or a disputed incident.
But the cameras alone aren’t enough.
Make sure Dashcam is enabled, your USB storage is functioning, Sentry Mode is configured appropriately, and you know how to preserve footage manually.
A few minutes spent checking these settings today could save significant frustration if you ever need video evidence for an insurance claim.
Explore More Tesla Tools and Guides: Visit MyTeslaSavings.com for Tesla troubleshooting guides, maintenance tips, charging cost calculators, road trip planning tools, and practical ways to reduce your ownership costs.
Disclaimer: Tesla features and settings vary by model, hardware, region, and software version. This article provides general information and is not legal or insurance advice. Always consult your Tesla owner’s manual and your insurance provider for guidance specific to your vehicle and coverage.