
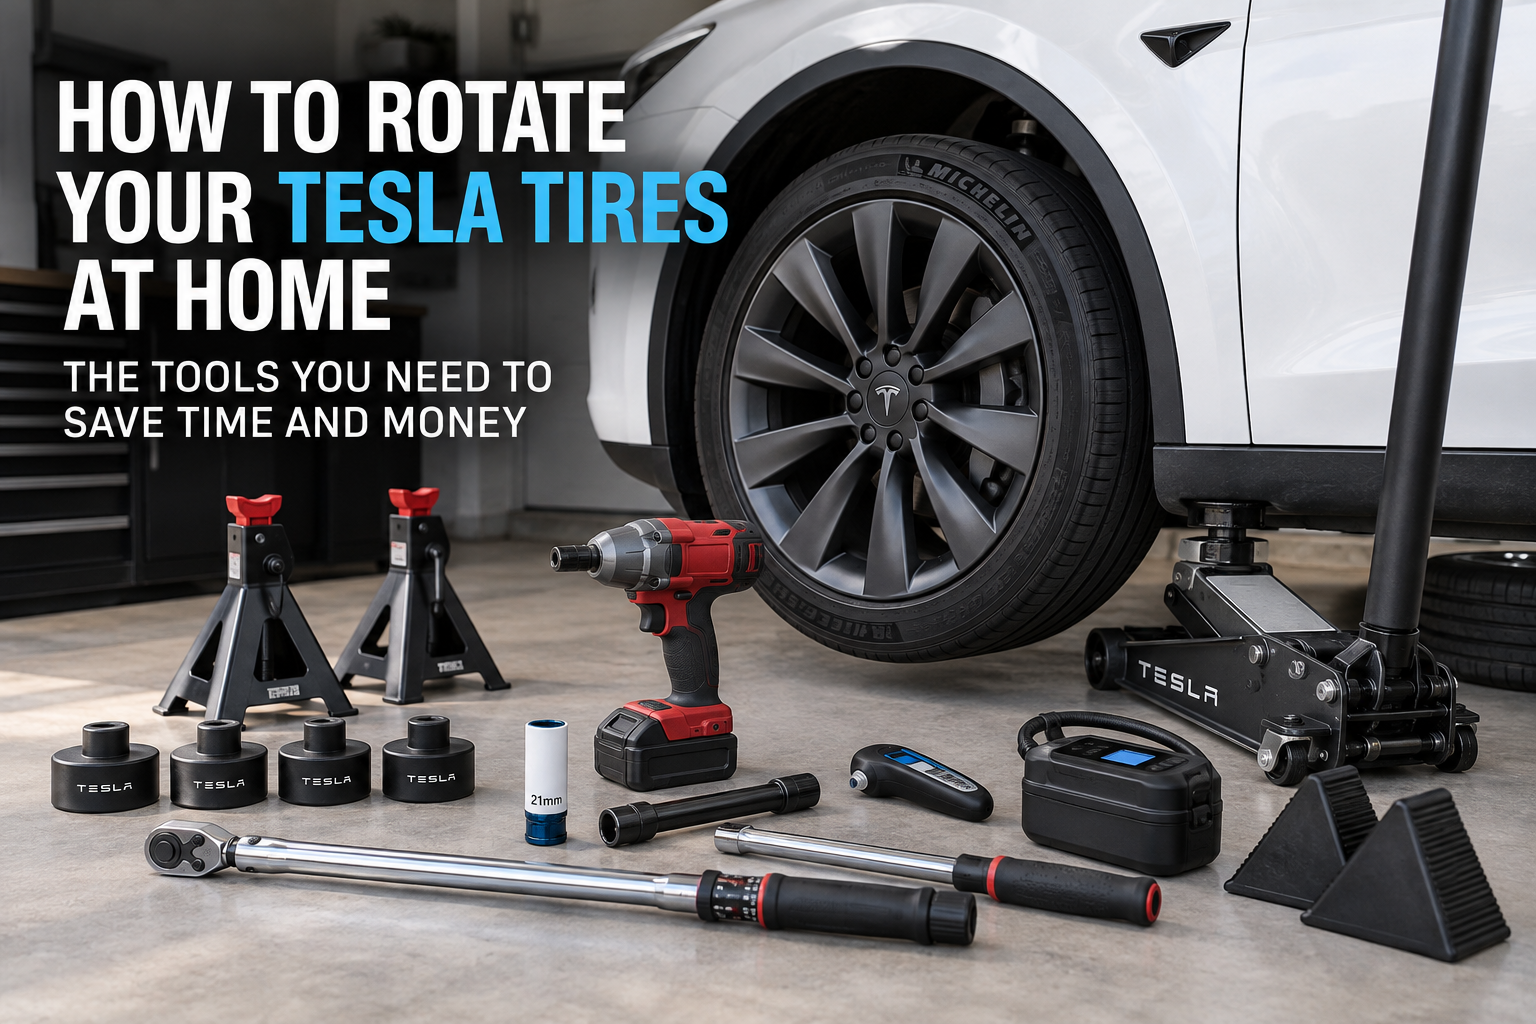
Owning a Tesla can save you from many of the maintenance expenses associated with a gas-powered vehicle. There are no oil changes, spark plugs, oil filters, or many of the other routine maintenance items we’re accustomed to paying for.
But there is one maintenance item you definitely shouldn’t ignore:
Your tires.
Tesla vehicles are relatively heavy, produce instant torque, and can put some serious demands on their tires. Regular tire rotations can help your tires wear more evenly and potentially extend their useful life.
The good news?
Rotating your Tesla tires is something many owners can do themselves at home.
With a few tools that you can easily find on Amazon, you can build your own Tesla tire rotation kit and stop scheduling appointments every time your tires need to be rotated.
Even better, most of these tools are a one-time purchase that you’ll be able to use for years.
In this guide, we’ll cover:
- How often you should rotate Tesla tires
- The tools you’ll need
- Why Tesla jack pads are important
- The correct Tesla lug nut socket size
- How to safely lift your Tesla
- Tesla tire rotation patterns
- How to torque the wheels correctly
- How to reset the tire service mileage
- How much money doing it yourself could save
Let’s get started.
How Often Should You Rotate Tesla Tires?
Tesla recommends rotating your tires approximately every 6,250 miles (10,000 km) or when the difference in tread depth between tires reaches 2/32 inch, whichever occurs first.
That’s a useful general rule, but don’t rely entirely on mileage.
Driving style, alignment, road conditions, tire type, acceleration habits, and even the roads you normally drive can affect tire wear.
If you enjoy taking advantage of that instant Tesla acceleration, you may find that your tires wear faster.
That’s why we recommend adding a simple tire tread depth gauge to your Tesla maintenance kit.
They’re inexpensive and take seconds to use.
Check the inside, center, and outside sections of each tire. Uneven wear can sometimes indicate an alignment or tire-pressure issue rather than simply a need for rotation.
First: Make Sure Your Tesla Tires Can Actually Be Rotated the Way You Think
This is extremely important.
Not every Tesla uses the same tire rotation pattern.
Before removing a single wheel, determine whether your Tesla has:
- Same-size, non-directional tires
- Directional tires
- Staggered wheels/tires with different front and rear sizes
Look at the sidewall of your tires.
A directional tire normally has an arrow showing its intended direction of rotation.
Also check the tire sizes on the front and rear.
If your Tesla has different size tires in the front and rear, do not simply swap the front wheels with the rear wheels.
Always follow the rotation pattern appropriate for your exact wheel and tire configuration.
The DIY Tesla Tire Rotation Tool Kit
Here’s where doing the job yourself gets interesting.
You don’t need a professional automotive shop.
A relatively small collection of tools can turn your garage into a basic Tesla tire maintenance station.
And nearly everything can be ordered from Amazon.
1. Tesla Jack Pads / Jack Pucks
This should probably be your first purchase.
Tesla vehicles have designated lifting points underneath the vehicle.
Tesla-compatible jack pads—often called Tesla jack pucks—fit into these lifting locations and provide an appropriate interface between the vehicle and lifting equipment.
A four-pack is inexpensive, easy to store, and useful even if you don’t plan on rotating your own tires.
We actually recommend keeping a set in the Tesla.
That way, if a tire shop ever needs to lift your vehicle, you’ll have the proper adapters available.
Look for:
- Durable rubber construction
- Secure locating post
- O-ring that helps hold the puck in place
- Storage case
- Model Y/Model 3 compatibility
Our recommendation: Buy the four-pack instead of a single puck.
It’s usually not much more expensive and gives you considerably more flexibility.
2. Low-Profile Floor Jack
Next you’ll need a quality floor jack.
A Tesla is heavy, so don’t buy the cheapest tiny jack you can find.
We prefer a quality low-profile floor jack with an appropriate lifting capacity for your vehicle and lifting method.
Low-profile designs also make it easier to position the jack underneath the vehicle.
A rapid-pump or dual-piston model can make the job noticeably faster.
If you’re building a garage setup that you’ll use for years, this is one tool where spending a little extra can make sense.
3. Quality Jack Stands
Never rely solely on a hydraulic floor jack to support a vehicle while you’re working around it.
You’ll want appropriately rated jack stands and a lifting/support method compatible with the Tesla’s designated lifting locations.
Make sure the vehicle is on a hard, flat and level surface before lifting it.
Never work underneath a vehicle supported only by a floor jack.
Your exact lifting and support setup matters, so familiarize yourself with Tesla’s lifting instructions before beginning.
4. Tesla 21mm Lug Nut Socket
Here’s an easy one.
For many Model 3 and Model Y configurations, Tesla specifies a:
We particularly like the protective thin-wall wheel sockets that have a plastic or non-marring sleeve around the outside.
Why?
Because it’s incredibly easy to accidentally bump or scrape a wheel while removing lug nuts.
You’ve spent enough money on those Tesla wheels.
Spend a few extra dollars on a protected socket.
Look for a 1/2-inch drive, 21mm deep impact socket.
5. 1/2-Inch Breaker Bar
Technically, you can use your torque wrench to loosen lug nuts.
We don’t recommend making a habit of it.
Instead, purchase a basic 1/2-inch breaker bar.
A longer breaker bar gives you more leverage, making it considerably easier to loosen tight lug nuts.
This is another inexpensive tool that you’ll probably use for years.
6. 1/2-Inch Torque Wrench
This is one tool you absolutely shouldn’t skip.
You don’t want to tighten Tesla lug nuts by feel.
For common Model 3 and Model Y applications, Tesla specifies a final lug-nut torque of:
That means you’ll need a torque wrench with a range that comfortably includes 129 lb-ft.
A 1/2-inch drive torque wrench is ideal.
Digital torque wrenches are nice, but they’re not required.
A good traditional click-style torque wrench works perfectly well for occasional tire rotations.
Just make sure the wrench’s rated range includes Tesla’s required torque specification for your particular vehicle.
7. Cordless Impact Wrench — Optional, But a Huge Time Saver
You don’t technically need an impact wrench.
But after doing your first few tire rotations, you’ll probably want one.
A cordless 1/2-inch impact wrench can remove already-loosened lug nuts in seconds.
That makes the entire process considerably faster.
If you already own cordless tools from Milwaukee, DeWalt, Makita, Ryobi or another major brand, buying an impact wrench that uses your existing batteries may be the most economical option.
One important point:
Don’t use the impact wrench as your final torque setting.
Thread the lug nuts by hand first, use the impact only appropriately during installation/removal, and perform the final tightening with your calibrated torque wrench.
8. Wheel Chocks
They’re inexpensive, take up almost no room and add another layer of safety.
Place wheel chocks according to your lifting procedure to help prevent the vehicle from moving.
We prefer rubber chocks rather than lightweight hollow plastic ones.
9. Tire Pressure Gauge
Since the wheels are already coming off, this is the perfect opportunity to inspect your tire pressures.
Tesla lists the appropriate pressure for your particular vehicle on the Tire and Loading Information label on the driver’s-side door pillar.
Don’t assume every Tesla should use the same pressure.
Check the sticker on your vehicle.
A good digital tire pressure gauge is inexpensive and useful to keep in the car.
10. Portable Tire Inflator
This isn’t absolutely necessary for the rotation itself, but it may be one of the best Tesla accessories you can buy.
After checking all four tire pressures, you can adjust them before finishing the job.
A cordless or 12V portable tire inflator makes this incredibly easy.
Better yet, keep it in your Tesla afterward.
It can be extremely useful if you discover a slowly leaking tire while traveling.
Optional Tool That Makes the Job Even Better: Tread Depth Gauge
Before moving your tires, record the tread depth at each wheel position.
Check three areas:
Inside | Center | Outside
Write the measurements down.
For example:
| Position | Inside | Center | Outside |
|---|---|---|---|
| Driver Front | ___ | ___ | ___ |
| Passenger Front | ___ | ___ | ___ |
| Driver Rear | ___ | ___ | ___ |
| Passenger Rear | ___ | ___ | ___ |
Doing this every 6,000 miles gives you an excellent picture of how your Tesla is wearing its tires.
If one tire starts wearing substantially faster on the inside or outside, you can investigate the problem before destroying an expensive tire.
How to Rotate Your Tesla Tires
Once you’ve gathered your tools, you’re ready to start.
Step 1: Park on a Flat, Solid Surface
Your garage or a flat concrete driveway is ideal.
Put the Tesla in Park.
You do not want to lift a vehicle on gravel, soft asphalt, dirt, a slope or an unstable surface.
Step 2: Determine Your Rotation Pattern
Do this before removing the wheels.
For same-size non-directional tires, Tesla’s service procedure uses a rotation pattern where the rear tires move forward and the front tires move to the opposite rear positions.
However, directional tires generally stay on the same side and move front-to-rear.
Staggered configurations require a different approach because the front and rear tires may be different sizes.
Never blindly follow a generic “X-pattern.”
Verify your particular Tesla’s tire sizes and tire type first.
Step 3: Measure Your Tread Depth
Record your measurements before moving anything.
This takes less than five minutes and gives you valuable information about how your tires are wearing.
Step 4: Loosen the Lug Nuts Before Lifting
Remove the wheel cover if necessary.
Using your:
slightly loosen each of the five lug nuts.
Don’t remove them.
You’re just breaking them loose while the tire is still firmly planted on the ground.
This prevents the wheel from spinning while you’re trying to loosen a stubborn lug nut.
Step 5: Position Your Tesla Jack Pad
Locate the designated lifting point underneath the Tesla.
Insert the Tesla jack pad into the lifting point.
Position the floor jack correctly underneath it.
Double-check your positioning before lifting.
The high-voltage battery is underneath the vehicle, so proper lifting-point placement is extremely important.
Step 6: Safely Lift and Support the Vehicle
Slowly raise the vehicle using the proper lifting procedure.
Use appropriately rated support equipment before removing wheels.
Once supported, verify the vehicle is stable before proceeding.
Never put any part of your body underneath a vehicle supported only by a hydraulic jack.
If you’re uncomfortable with safely lifting and supporting the vehicle, having a professional perform the rotation is the better choice.
Step 7: Remove the Wheels
Now remove the loosened lug nuts.
This is where a cordless impact wrench can save considerable time.
Remove the wheel and place it safely to the side.
This is also a great opportunity to inspect:
- Tire tread
- Inside shoulder wear
- Nails or screws
- Sidewall damage
- Wheel damage
You rarely get such a good view of the inside edge of your tires while they’re mounted.
Step 8: Move the Tires to Their New Positions
Follow the correct pattern for your wheel and tire configuration.
Don’t assume all four wheels are interchangeable.
Again, check for:
- Staggered wheel sizes
- Different front/rear tire sizes
- Directional arrows on the tire
Step 9: Reinstall the Wheels
Position the wheel onto the hub.
Start every lug nut by hand.
This is important.
Starting them manually helps prevent cross-threading.
Snug the lug nuts in a star pattern rather than tightening them sequentially around the wheel.
Step 10: Lower the Tesla
Carefully lower the vehicle according to the lifting procedure.
Once the vehicle is properly back on the ground, you’re ready for the most important final step.
Torque Your Tesla Lug Nuts Correctly
Get out the torque wrench.
For common Model Y and Model 3 applications, the specification is:
Set the torque wrench accordingly and tighten the lug nuts using a star pattern.
Don’t simply go around the wheel clockwise.
A star pattern helps the wheel seat evenly against the hub.
And don’t use an impact wrench for final torque.
Finish every lug nut with the torque wrench.
Check Your Tire Pressures
Before putting your tools away, check all four tires.
Use the recommended cold tire pressure shown on the tire information label on your particular Tesla.
If one tire is low, use your portable inflator to bring it up to specification.
This is another reason we think a digital inflator is worth adding to your DIY kit.
Reset the Tire Service Mileage
Once you’ve finished rotating the tires, don’t forget to update the vehicle.
Depending on your Tesla and software version, the exact touchscreen menus may vary, but Tesla’s current service procedure uses the vehicle’s Controls > Service > Wheel & Tire > Tires area to reset tire service information.
Follow the prompts applicable to your vehicle.
A short drive may be required afterward for the vehicle’s tire monitoring system to recalibrate.
How Much Can You Save Rotating Your Own Tesla Tires?
The first rotation isn’t really where you save money.
You’re buying tools.
But consider what happens afterward.
Your floor jack, torque wrench, breaker bar, jack pads, socket, wheel chocks and impact wrench aren’t disposable.
You’ll use them again and again.
If you rotate your tires roughly every 6,250 miles and keep your Tesla for 100,000 miles, that’s potentially around:
16 tire rotations.
And if you have two vehicles?
The tools start paying for themselves even faster.
More importantly, you eliminate the hassle of:
- Making an appointment
- Driving to a tire shop
- Waiting for the car
- Driving home
Once you get comfortable with the process, rotating tires in your own garage can become another quick Saturday morning maintenance job.
Our Ideal Amazon Tesla Tire Rotation Kit
If we were building a DIY Tesla tire rotation kit from scratch, here’s what we’d buy:
Must Have
- Tesla jack pad/puck set
- Low-profile floor jack
- Appropriately rated jack stands/support equipment
- 21mm protective lug nut socket
- 1/2-inch breaker bar
- 1/2-inch torque wrench
- Heavy-duty wheel chocks
Highly Recommended
- Cordless 1/2-inch impact wrench
- Digital tire pressure gauge
- Portable tire inflator
- Tire tread depth gauge
- Work gloves
Put everything into one toolbox or garage cabinet and you’ve essentially created your own Tesla tire maintenance station.
One Tool We’d Buy Even If You Don’t DIY Your Rotations
If you buy absolutely nothing else from this list, get:
A set of Tesla jack pads for less than $15.
They’re inexpensive, small and easy to keep in the lower trunk storage area.
Even if you never personally lift the car, you can have them available when a tire shop or mechanic services your Tesla.
For Tesla owners who do want to start performing basic maintenance themselves, add a quality torque wrench, 21mm protected socket and low-profile jack.
Those few tools open the door to doing a lot more of your own basic wheel and tire maintenance.
Is Rotating Your Own Tesla Tires Worth It?
For us, the answer is yes—if you’re comfortable safely lifting a vehicle.
There isn’t anything particularly complicated about removing and reinstalling a wheel.
The important parts are having the right equipment, using the designated Tesla lifting points, supporting the vehicle safely, following the correct rotation pattern and torquing the lug nuts to the proper specification.
The initial investment in tools costs more than paying for a single tire rotation.
But that’s not really the point.
You’re buying the tools once.
After that, they’re sitting in your garage waiting for the next rotation.
No appointments.
No waiting rooms.
No wondering whether the shop has the correct Tesla jack pads.
And no paying someone else for a maintenance job you’re capable of doing yourself.
Our Top DIY Tesla Tire Rotation Supplies
For the easiest setup, search Amazon for:
1. Tesla Model Y/Model 3 Jack Pads – 4 Pack – $14
Essential for properly interfacing with the Tesla lifting points.
2. 2.5- or 3-Ton Low-Profile Floor Jack
A quality low-profile jack makes lifting considerably easier.
3. Appropriately Rated Jack Stands
Never rely solely on your hydraulic floor jack.
4. 21mm Protective Tesla Lug Nut Socket
A non-marring sleeve can help protect expensive wheels.
5. 1/2-Inch Breaker Bar
Makes breaking the lug nuts loose much easier.
6. 1/2-Inch Torque Wrench
Necessary for accurately achieving the specified final lug-nut torque.
7. Cordless 1/2-Inch Impact Wrench
Optional, but probably our favorite time-saving tool.
8. Tire Tread Depth Gauge
An inexpensive way to monitor tire wear.
9. Digital Tire Pressure Gauge
Useful during rotations and throughout the year.
10. Portable Tire Inflator
Keep it in the Tesla when you’re finished.
Buying everything at once isn’t necessary.
Start with the essential tools and add the convenience items over time.
After a couple of rotations, you may wonder why you ever scheduled an appointment just to have someone move four wheels around.
Safety Note: Always consult the owner’s/service information for your exact Tesla model, model year, wheels and tires before lifting the vehicle or rotating tires. Wheel configurations, lifting procedures and specifications can differ. Never work underneath a vehicle supported only by a hydraulic jack.

